Free Sublimation Templates and How to Use Them
Regular maintenance keeps your printer performing at its best. Follow this routine to improve print quality, reduce downtime, and extend printer life.
Why it's Important to have Accurate Design Placement
If you're just getting started with sublimation, you may be wondering what a sublimation template is and why you even need one. Sublimation templates are premade design files that provide general guidelines of the image size that you will want to print for your product. They conform to the size and shape of your sublimation blank, and most of our templates include a small bleed (that is, printing that goes beyond the edge of the substrate) which covers you in case your item shifts slightly during heat transfer.
Sublimation templates are super useful as they take the guesswork out of what size your substrate is and how big of a design you need to print. Just simply pop your design into the template, print, and heat press it! Without a template, you may find yourself printing your design a few times to get the size just right, which wastes not only ink and paper but also your valuable production time.
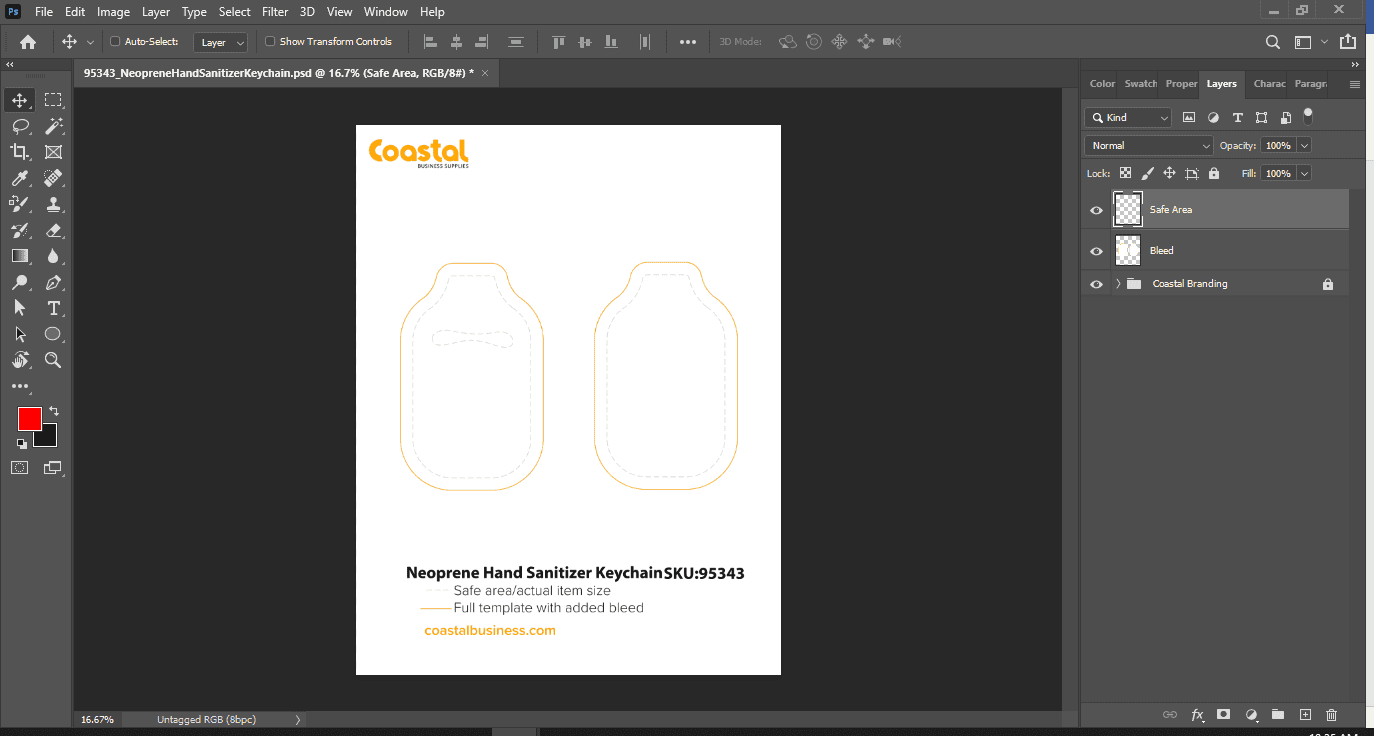
Below, you will see a template we made for our neoprene hand sanitizer keychain holders. In this image, you can see the item size, the bleed layer, and our Coastal branding.
How to Use Your Sublimation Template?
Once you’ve downloaded your template, open it in your design program. For the purposes of this demonstration, we’ll be using Adobe Photoshop, but if you’re using Illustrator or CorelDRAW, the instructions will be similar. So don’t worry!
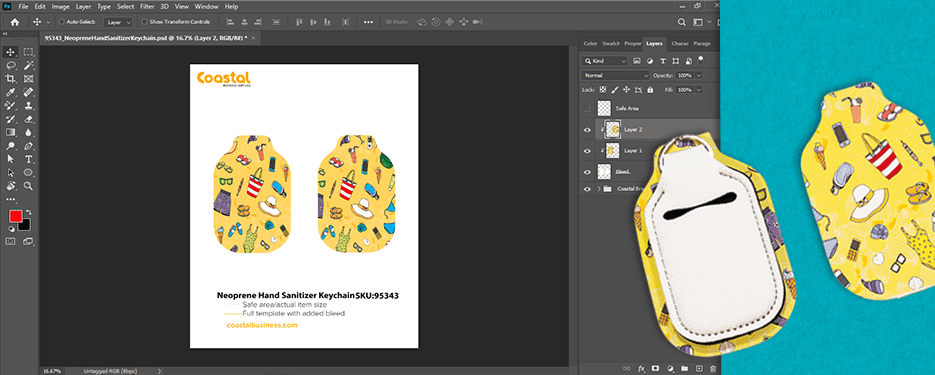
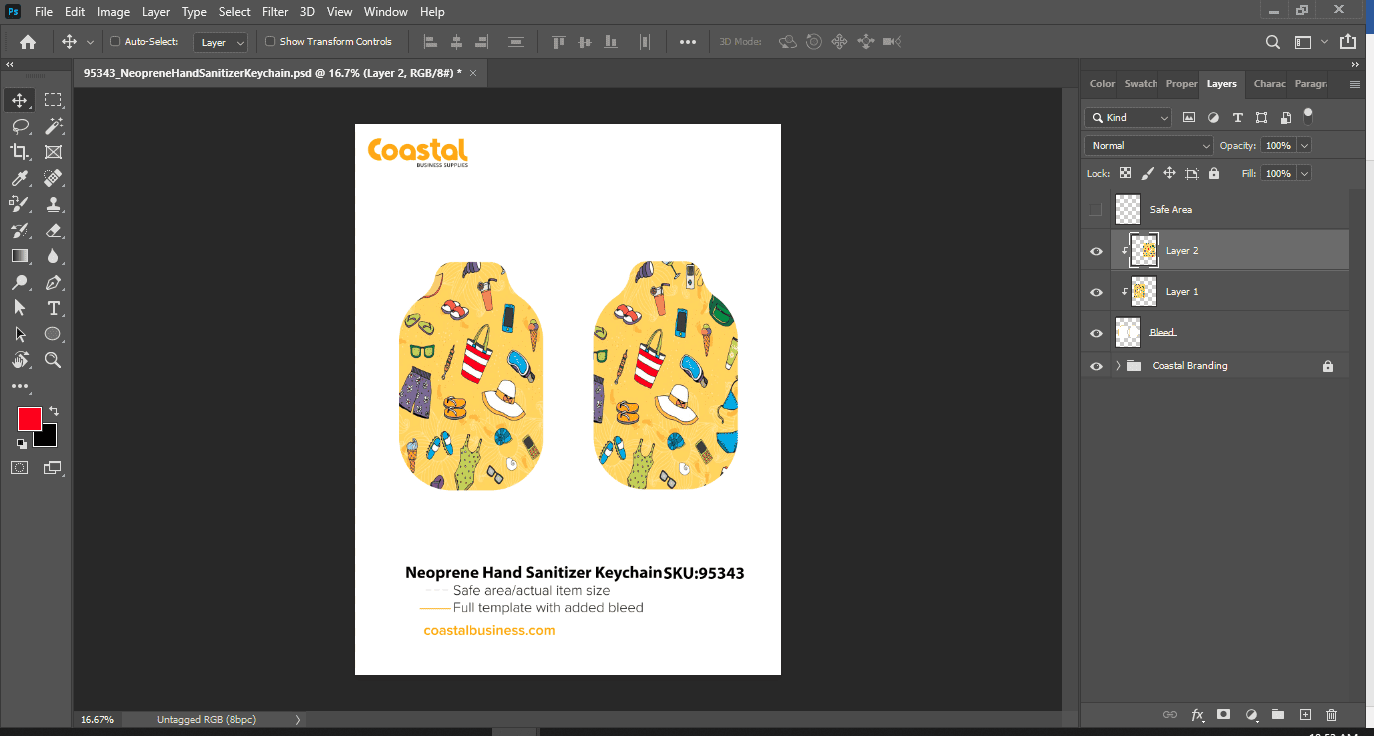
When you’ve got the template opened, you will notice three layers – safe area, bleed, and Coastal branding. The safe area is the actual item size. The bleed area is some extra printing space that we’ve added beyond the item’s size (between .25” and 1”), which gives you some wiggle room when you go to transfer.
Now, bring your designed image into your design program. (We should mention, you will probably want to have an image already prepared by the time you’re using this template). This could be a pattern that you downloaded online on websites like freepik.com or Adobe Stock, an SVG image you purchased, a photograph, etc.
Next, size your design appropriately within the template’s bleed area as shown in the video below. Next, create a clipping mask to clip your image into the bleed area (not the safe area). In Photoshop, this involves placing your design layer above the bleed layer, then right-clicking the design layer and pressing “create clipping mask.” After clipping your design into your bleed layer, you can hide the item size as well as the Coastal branding. And now, you should have one ready-to-go image that aligns perfectly with your blank!
How Does this Work for Curved Items?
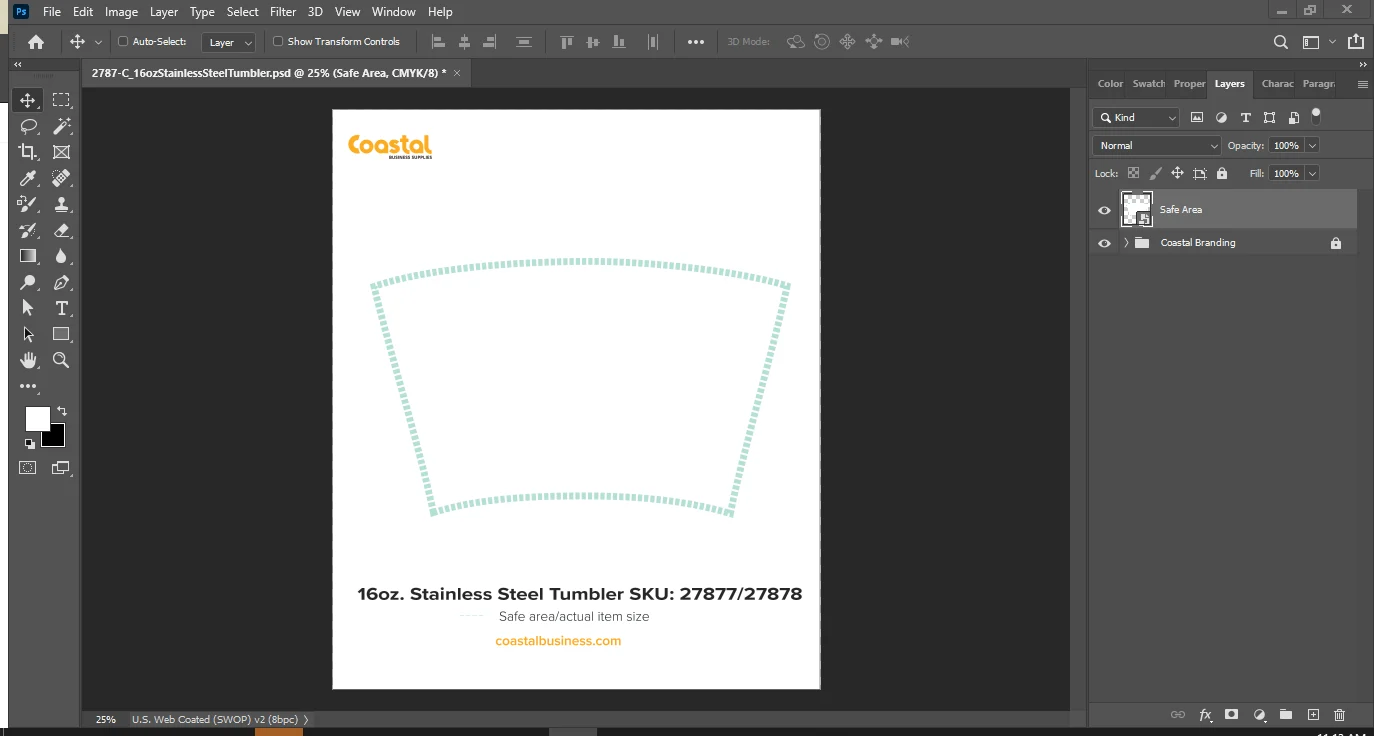
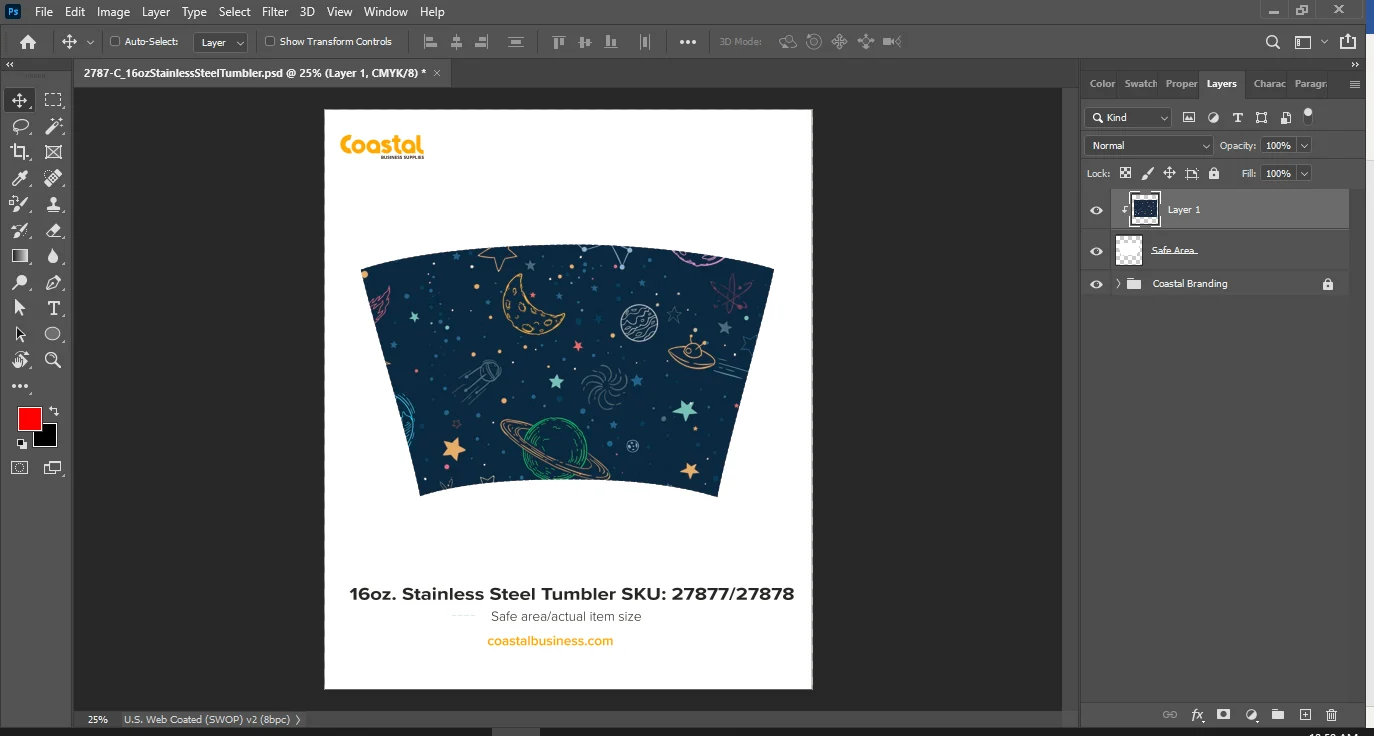
When working with our templates for curved items such as latte mugs and certain other drinkware, you will notice there is not a bleed layer – only a safe area. This is normal! For these items, you will follow the same steps above except create a clipping mask to clip your mask onto the safe area instead.
Troubleshooting & Common Sublimation Issues
If you're experiencing print quality or transfer issues, use the guide below to identify common problems, understand the cause, and apply the recommended solution.
Missing Colors or Blank Areas
Symptoms
One or more colors are missing from the print.
Possible Cause
Print head nozzles are clogged due to dried ink or infrequent printing.
Recommended Solution
- Run a nozzle check.
- Perform one or two head cleaning cycles.
- Print a test image to verify all colors.
Horizontal Banding
Symptoms
Visible horizontal white lines appear across prints.
Possible Cause
Partially clogged nozzles or print head alignment issues.
Recommended Solution
- Run a nozzle check.
- Align the print head.
- Clean the print head if required.
Colors Look Dull
Symptoms
Transfers appear faded after pressing.
Possible Cause
Incorrect heat press settings or unsuitable substrate.
Recommended Solution
- Verify time and temperature.
- Use medium pressure.
- Use quality sublimation blanks.
Paper Feed Problems
Symptoms
Paper jams or feeds unevenly.
Possible Cause
Dirty feed rollers or damp paper.
Recommended Solution
- Clean the feed rollers.
- Store paper correctly.
- Remove dust from inside the printer.
Choosing the Right Sawgrass System for Your Needs
Whether you're launching a new sublimation business or expanding an existing production setup, choosing the right Sawgrass printer depends on your workspace, production goals, and the products you create. Compare the SG500 and SG1000 to find the ideal solution for your business.

Sawgrass SG500
The SG500 is an excellent choice for hobbyists, home businesses, and small production environments looking for professional-quality sublimation printing.
- Compact desktop design
- Perfect for mugs, apparel, coasters & gifts
- Low to medium production volume
- Simple setup and easy maintenance
- Cost-effective entry into sublimation
Sawgrass SG1000
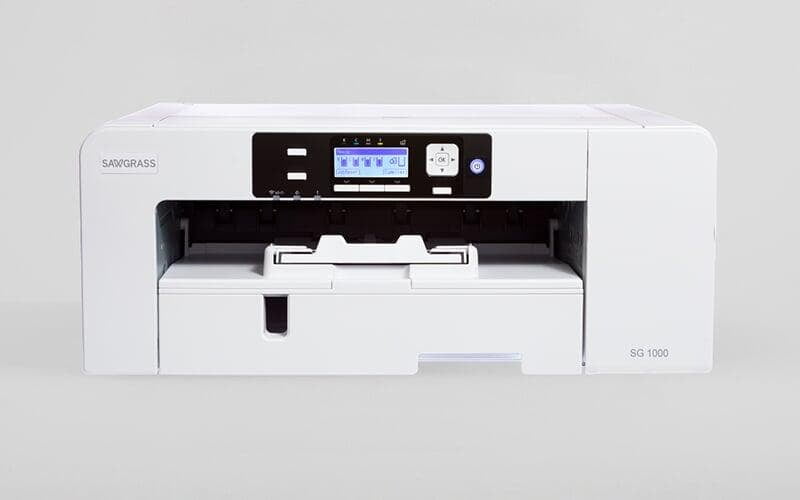
Designed for higher production demands, the SG1000 supports larger media sizes and delivers exceptional output for commercial sublimation businesses.
- Supports larger transfer sizes
- Ideal for apparel, signage & home décor
- Medium to high production capacity
- Expandable with optional bypass tray
- Built for business growth
Tips to Maximize Sublimation Success
Great sublimation results come from more than just a quality printer. Following these recommended practices will help you achieve vibrant colors, consistent output, and long-term printer reliability.
Use Genuine Sawgrass Ink
Genuine inks are engineered specifically for Sawgrass printers, delivering reliable performance and accurate color reproduction.
Print Regularly
Print a small image or perform a nozzle check every few days to keep ink flowing and reduce the chance of clogged nozzles.
Store Sublimation Paper Correctly
Keep paper sealed and away from humidity to maintain transfer quality and prevent paper curl.
Maintain Your Printer
Follow the recommended maintenance schedule to ensure consistent print quality and extend printer life.
Use Recommended Heat Settings
Always match the correct temperature, pressure, and pressing time to the substrate being used.
Keep Your Workspace Clean
Dust-free equipment and a clean work area help reduce print defects and improve overall productivity.